Easter Jell-O Pie

Why You’ll Love This Recipe
There’s so much to adore about Easter Jell-O Pie. Here’s why it’s a must-try:
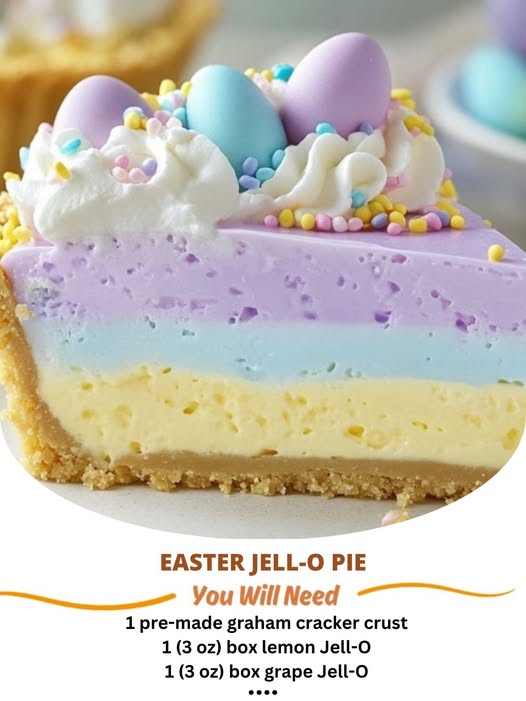
- Bright and Festive : The vibrant colors of Jell-O make this pie perfect for Easter and spring celebrations.
- Easy to Make : Simple ingredients and minimal steps make this recipe accessible for bakers of all levels.
- Customizable : Use your favorite Jell-O flavors and toppings to create a pie that’s uniquely yours.
- Kid-Friendly : Little ones will love helping assemble and decorate this playful dessert.
- Make-Ahead Friendly : Prepare it the day before and chill until ready to serve—ideal for stress-free entertaining.
Ingredients You’ll Need
The secret to this pie lies in its simple yet indulgent combination of ingredients. Here’s what you’ll need:
For the Crust:
- 1 ½ cups graham cracker crumbs (about 10–12 sheets, crushed)
- ¼ cup granulated sugar
- 6 tablespoons unsalted butter (melted)
For the Filling:
- 1 box (3 oz) flavored Jell-O (such as strawberry, lime, or lemon)
- 1 cup boiling water
- 1 cup cold water
- 1 container (8 oz) whipped topping (like Cool Whip, thawed)
- Optional Add-Ins : Mini marshmallows, shredded coconut, or fresh fruit
For Garnish (Optional):
- Whipped cream
- Sprinkles
- Fresh berries
- Grated chocolate
Step-by-Step Instructions
Ready to whip up this colorful, jiggly pie? Follow these easy steps:
Step 1: Prepare the Crust
- In a mixing bowl, combine the graham cracker crumbs, sugar, and melted butter until the mixture resembles wet sand.
- Press the mixture firmly into the bottom and up the sides of a 9-inch pie pan to form an even layer. Use the back of a spoon or your hands to smooth it out.
- Chill the crust in the refrigerator while you prepare the filling.
Step 2: Make the Jell-O Layer
- In a large mixing bowl, dissolve the Jell-O powder in 1 cup of boiling water, stirring for 2–3 minutes until completely dissolved.
- Stir in 1 cup of cold water to cool the mixture slightly.
Step 3: Fold in the Whipped Topping
- Gently fold the thawed whipped topping into the Jell-O mixture until fully combined and smooth.
- If using optional add-ins like mini marshmallows or shredded coconut, stir them in at this stage.
Step 4: Assemble the Pie
- Pour the Jell-O mixture into the prepared crust, spreading it evenly with a spatula.
- Tap the pie pan gently on the counter to remove any air bubbles.
Step 5: Chill and Set
- Refrigerate the pie for at least 4–6 hours , or until fully set. For best results, chill overnight.
Step 6: Garnish and Serve
- Once set, garnish the pie with additional whipped cream, sprinkles, fresh berries, or grated chocolate, if desired.
- Slice and serve chilled, enjoying the wobbly, refreshing goodness!
Why This Recipe Works So Well
The magic of Easter Jell-O Pie lies in its simplicity and balance of textures. The buttery graham cracker crust provides a sturdy base, while the Jell-O filling adds a refreshing, jiggly element that’s both fun and flavorful. The whipped topping ties everything together with its light, creamy finish. Together, these elements create a dessert that’s as playful as it is satisfying—a true crowd-pleaser.
Easter Jell-O Pie

Variations to Try
While the classic version is divine, here are some creative ways to switch things up:
- Layered Flavors : Use multiple Jell-O flavors to create a rainbow effect or striped layers.
- Switch the Crust : Substitute Oreo crumbs or crushed pretzels for a different texture and flavor.
- Add Fresh Fruit : Top the pie with sliced strawberries, kiwi, or mandarin oranges for extra freshness.
- Gluten-Free Option : Use gluten-free graham crackers or almond flour for the crust to accommodate dietary restrictions.
- Vegan Version : Use plant-based whipped topping and gelatin-free Jell-O alternatives for a vegan-friendly option.
Tips for Success
- Use Room-Temperature Ingredients : Thaw the whipped topping ahead of time for easier folding.
- Chill Thoroughly : Allow enough time for the pie to set completely—rushing this step can result in a messy slice.
- Save Leftovers : Store the pie in an airtight container in the refrigerator for up to 3 days.
- Freeze for Later : Freeze slices of the pie (without toppings) for up to 1 month. Thaw in the fridge before serving.
- Experiment with Flavors : Try tropical flavors like pineapple or orange for a springtime twist.
Serving Suggestions
This Easter Jell-O Pie is incredibly versatile and pairs well with a variety of occasions. Here are some ideas to enhance your experience:
- Easter Brunch : Serve it alongside quiches, frittatas, and fresh fruit for a festive spread.
- Spring Celebrations : Include it on your Mother’s Day or baby shower table for a pop of color.
- Kids’ Favorite : Let kids help decorate the pie with sprinkles or candy for a fun activity.
- Potluck Dessert : Bring it to gatherings—it’s always a hit with its bright, cheerful appearance.
- Gift Idea : Package slices in decorative boxes or jars tied with ribbon for thoughtful homemade gifts.
Final Thoughts
With its vibrant colors, refreshing flavors, and creamy texture, Easter Jell-O Pie is a dessert worth making again and again. Whether you’re hosting a gathering, celebrating a special occasion, or simply craving something sweet and playful, this recipe delivers big on taste and charm.
So, the next time you’re in the mood for something fun, flavorful, and utterly satisfying, give this pie a try. Trust us—it’s quick, easy, and absolutely divine!
Have you tried this recipe yet? Share your thoughts, tips, and variations in the comments below. Happy baking! 🥧🌈✨