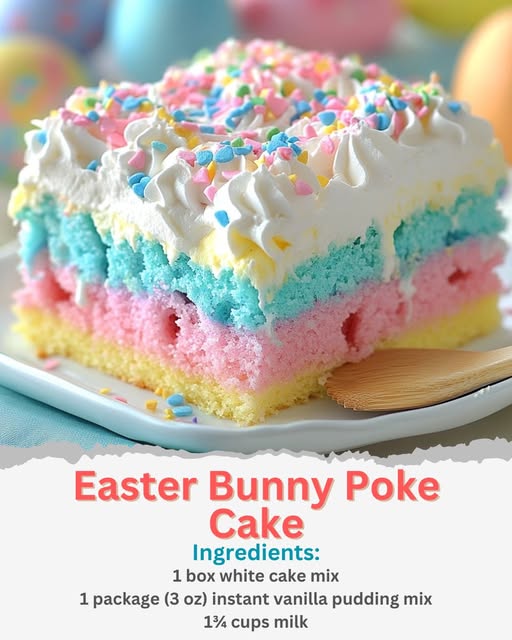
Easter Bunny Poke Cake
There’s something magical about Easter—the blooming flowers, the vibrant colors, and the joy of gathering with loved ones. One of my fondest memories is baking this Easter Bunny Poke Cake with my grandmother. The colorful layers and delightful flavors made it the star of our family gatherings. Today, I share this cherished recipe with you, hoping it brings as much joy to your celebrations as it has to mine.

Why You’ll Love This Recipe
-
- Visually Stunning: The pastel swirls and festive decorations make this cake a centerpiece for any Easter table.
- Easy to Prepare: Using a boxed cake mix simplifies the process, allowing even novice bakers to achieve impressive results.
-
- Moist and Flavorful: The pudding infusion ensures every bite is moist, rich, and bursting with flavor.
- Customizable: Easily adapt the colors and decorations to suit your preferences or match your holiday theme.
- Kid-Friendly: A fun baking project that children can participate in, from mixing colors to adding decorations.
Ingredients You’ll Need
For the Cake:
- 1 box white cake mix (plus ingredients listed on the box: typically eggs, oil, and water)
- Food coloring gels in pastel shades (pink, blue, yellow)
For the Pudding Layer:
-
- 1 package (3 oz) instant vanilla pudding mix
- 1¾ cups cold milk
For the Topping:
-
- 1 container (8 oz) whipped topping (e.g., Cool Whip), thawed
- 1 cup white chocolate chips, melted
- Pastel sprinkles for decoration
- Marshmallow bunny Peeps and mini chocolate eggs (optional, for garnish)
Step-by-Step Instructions
1. Prepare the Cake Batter
-
- Preheat your oven to 350°F (175°C). Grease a 9×13-inch baking dish and set aside.
- In a large bowl, prepare the white cake batter according to the package instructions.
- Divide the batter evenly into three separate bowls. Add a few drops of food coloring to each bowl to achieve your desired pastel shades. Mix until the colors are evenly distributed.
Tip: Use gel food coloring to achieve vibrant hues without altering the batter’s consistency.
2. Layer and Swirl the Batter
-
- Using a spoon or ice cream scoop, drop alternating spoonfuls of each colored batter into the prepared baking dish, creating a patchwork of colors.
- Once all the batter is in the pan, gently tap the dish on the counter to settle any air bubbles.
- For a marbled effect, use a toothpick or knife to lightly swirl the colors together. Be careful not to overmix, as you want to maintain distinct colors.
Tip: Swirling too much can muddy the colors. A gentle hand ensures a beautiful marbled appearance.
3. Bake the Cake
- Place the baking dish in the preheated oven and bake for 30-35 minutes, or until a toothpick inserted into the center comes out clean.
- Once baked, remove the cake from the oven and let it cool in the pan for about 10 minutes.
Tip: Avoid overbaking to ensure the cake remains moist.
4. Poke and Fill with Pudding
- While the cake is still warm, use the handle of a wooden spoon or a large straw to poke holes evenly across the surface, spacing them about 1 inch apart.
- In a medium bowl, whisk together the instant vanilla pudding mix and cold milk until smooth and slightly thickened, about 2 minutes.
- Pour the pudding mixture over the cake, ensuring it fills the holes. Use a spatula to spread it evenly across the surface.
Tip: Pouring the pudding while it’s still liquid allows it to seep deeply into the cake, enhancing moisture and flavor.
5. Chill and Set
- Allow the cake to cool to room temperature, then refrigerate for at least 2 hours to let the pudding set and the flavors meld.
Tip: For best results, refrigerate overnight. This allows the cake to fully absorb the pudding, resulting in a moist texture.
6. Add Whipped Topping and Decorate
- Once the cake has chilled and the pudding is set, spread the thawed whipped topping evenly over the surface.
- Drizzle the melted white chocolate over the cake for extra richness.
- Decorate with pastel sprinkles, marshmallow bunny Peeps, and mini chocolate eggs as desired.
Tip: For a “grass” effect, tint shredded coconut with green food coloring and sprinkle it over the whipped topping before adding other decorations.
Serving and Storage Tips
-
- Serving: Slice the cake into squares and serve chilled. This dessert pairs wonderfully with a cup of tea or a glass of cold milk.
- Storage: Cover the cake with plastic wrap or store leftovers in an airtight container in the refrigerator for up to 3 days.
- Freezing: While the cake can be frozen, it’s best to do so before adding the whipped topping and decorations. Wrap the cooled, undecorated cake tightly in plastic wrap and aluminum foil, then freeze for up to 2 months. Thaw in the refrigerator before adding the toppings and serving.
Helpful Notes
-
- Alternative Pudding Flavors: Try using white chocolate or lemon instant pudding mix instead of vanilla for a twist.
- Homemade Whipped Cream: If you prefer a homemade touch, whip 1½ cups of cold heavy cream with ¼ cup powdered sugar and 1 teaspoon vanilla extract until stiff peaks form.
- Extra Decoration Ideas: Add edible glitter, mini marshmallows, or crushed candy for a fun twist.
Frequently Asked Questions
-
- Can I use homemade cake batter instead of a box mix? Yes! You can substitute a homemade white cake batter if you prefer. Just ensure the consistency is similar to a boxed mix.
- Why did my cake turn out dry? Overbaking is the most common cause. Check your cake a few minutes before the suggested baking time.
- Can I make this cake ahead of time? Absolutely! This cake tastes even better when made a day in advance, allowing the pudding to soak in completely.
- What other toppings can I use? Crushed cookies, toasted coconut, or fresh berries make great additions!
- How do I make this cake gluten-free? Use a gluten-free cake mix and ensure all other ingredients, including pudding mix, are gluten-free.
Final Thoughts
This Easter Bunny Poke Cake is a showstopper that brings joy to any gathering. With its vibrant colors, creamy pudding, and delightful toppings, it’s a treat both kids and adults will love. Serve it alongside a fresh fruit salad or a cup of coffee for a perfect holiday indulgence. Have you tried this recipe? Let me know how it turned out and any fun twists you added!