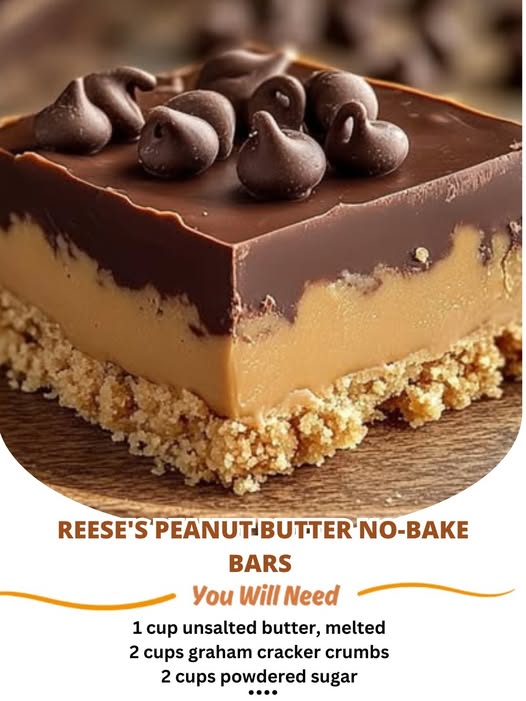
Reese’s Peanut Butter No-Bake Bars 

Why You’ll Love This Recipe
- No Baking Required : Perfect for hot days or when you want a quick dessert without turning on the oven.
- Decadent & Rich : Layers of peanut butter, chocolate, and crunch create an irresistible combination.
- Customizable : Add your favorite mix-ins like chopped peanuts, pretzels, or even Reese’s Pieces.
- Make-Ahead Friendly : Can be prepared in advance and stored in the fridge or freezer.
- Crowd-Pleasing : Always a hit at parties, holidays, or casual family gatherings.
Ingredients You’ll Need
Makes 16–20 bars
For the Crust:
- 1 1/2 cups graham cracker crumbs (about 10–12 graham crackers, crushed)
- 1/4 cup granulated sugar
- 1/2 cup unsalted butter , melted
For the Peanut Butter Layer:
- 1 cup creamy peanut butter
- 1/2 cup unsalted butter , softened
- 1 cup powdered sugar
For the Chocolate Topping:
- 1 cup semi-sweet chocolate chips
- 2 tbsp unsalted butter
Optional Add-Ins:
- 1/2 cup chopped peanuts (for extra crunch)
- 1/4 cup Reese’s Pieces (for added flair)
Step-by-Step Instructions
Step 1: Make the Crust
- In a medium mixing bowl, combine the graham cracker crumbs, granulated sugar, and melted butter. Mix until the mixture resembles wet sand.
- Press the mixture evenly into the bottom of an 8×8-inch baking pan lined with parchment paper or lightly greased. Use the back of a spoon or your hands to press it down firmly.
Step 2: Make the Peanut Butter Layer
- In a separate bowl, combine the creamy peanut butter, softened butter, and powdered sugar. Mix until smooth and creamy.
- Spread the peanut butter mixture evenly over the graham cracker crust, using a spatula to smooth it out.
Step 3: Make the Chocolate Topping
- In a microwave-safe bowl, melt the chocolate chips and 2 tablespoons of butter together in 30-second intervals, stirring between each interval, until smooth and fully melted.
- Pour the melted chocolate over the peanut butter layer and spread it evenly with a spatula.
- Optional: Sprinkle chopped peanuts or Reese’s Pieces over the chocolate layer for added texture and flavor.
Step 4: Chill
- Place the pan in the refrigerator and chill for at least 2–3 hours , or until the bars are firm and set.
Step 5: Slice & Serve
- Once firm, lift the bars out of the pan using the parchment paper and cut into squares. Serve chilled or at room temperature.
Why This Recipe Works
-
- Layered Magic : The combination of crunchy crust, creamy peanut butter, and smooth chocolate creates a perfect balance of textures and flavors.
- No-Bake Simplicity : Minimal effort and no special equipment needed—just mix, layer, and chill.
- Customizable Toppings : Add nuts, candy, or pretzels to make the bars uniquely yours.
Variations to Try
-
- White Chocolate Drizzle : Melt white chocolate and drizzle it over the top for a decorative touch.
- Pretzel Crunch : Crush pretzels and mix them into the crust or sprinkle them on top for a salty-sweet twist.
- Dark Chocolate Option : Use dark chocolate chips instead of semi-sweet for a richer flavor.
- Gluten-Free Option : Substitute gluten-free graham crackers for a GF-friendly version.
- Nut-Free Version : Swap peanut butter for sunflower seed butter and omit any nut toppings.
Tips for Success
- Press Firmly : Ensure the graham cracker crust is pressed down tightly to prevent crumbling when slicing.
- Smooth Layers : Use a spatula dipped in warm water to smooth out the peanut butter and chocolate layers for a professional finish.
- Storage : Store leftovers in an airtight container in the fridge for up to 5 days or freeze for longer storage.
Serving Suggestions
- Romantic Touch : Plate individually with a dusting of powdered sugar or a drizzle of chocolate syrup for elegance.
- Party Platter : Arrange on a dessert table with other treats like brownies, cookies, or fruit skewers.
- Brunch Staple : Pair with coffee or milk for a decadent breakfast treat.
Final Thoughts
These Reese’s Peanut Butter No-Bake Bars are a foolproof recipe that proves dessert doesn’t have to be complicated to be delicious. With their gooey peanut butter center, crunchy crust, and rich chocolate topping, they’re a treat you’ll find yourself making again and again. Whether you’re hosting a party, gifting homemade goodies, or simply craving something sweet, these bars are sure to please.
Your turn! Have you ever made no-bake bars before? Share your favorite variations or serving ideas below.